Category

DIY

DIY

How To Make Cute, Personalized Thank You Notes

How To Make Cute, Personalized Thank You Notes by Life As A Mama

Christmas is over, gifts have been opened and played with, and it’s time to send thank you notes. I think thank you notes are very important and try to make sure one is sent when we receive gifts. My kids are 3 and 6…not quite old enough to write notes themselves yet. My daughter, the 6 year old, could actually probably write them herself, but it would take hours and I would have to sit with her and tell her how to spell everything and we would both get frustrated so, until she’s able to do it herself (maybe next year when she’s in 1st grade), I’m the thank you note writer. Sometimes she dictates the thank you notes to me, which works well for us until she gets sidetracked by something else. She’s 6…her attention span is short.

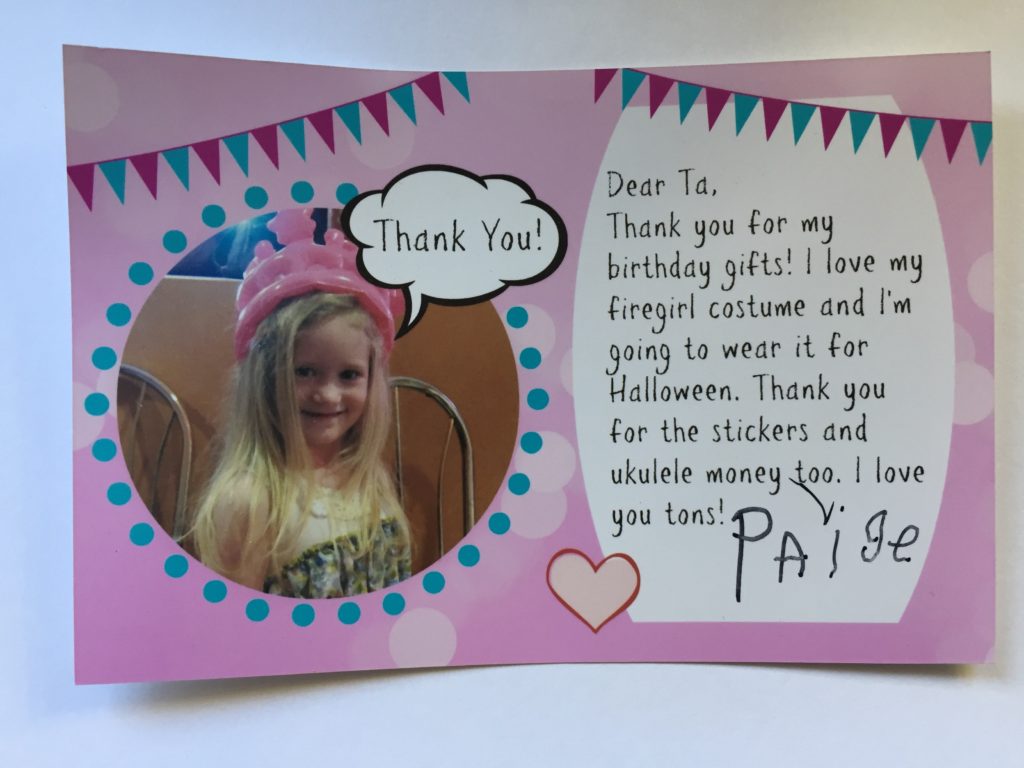
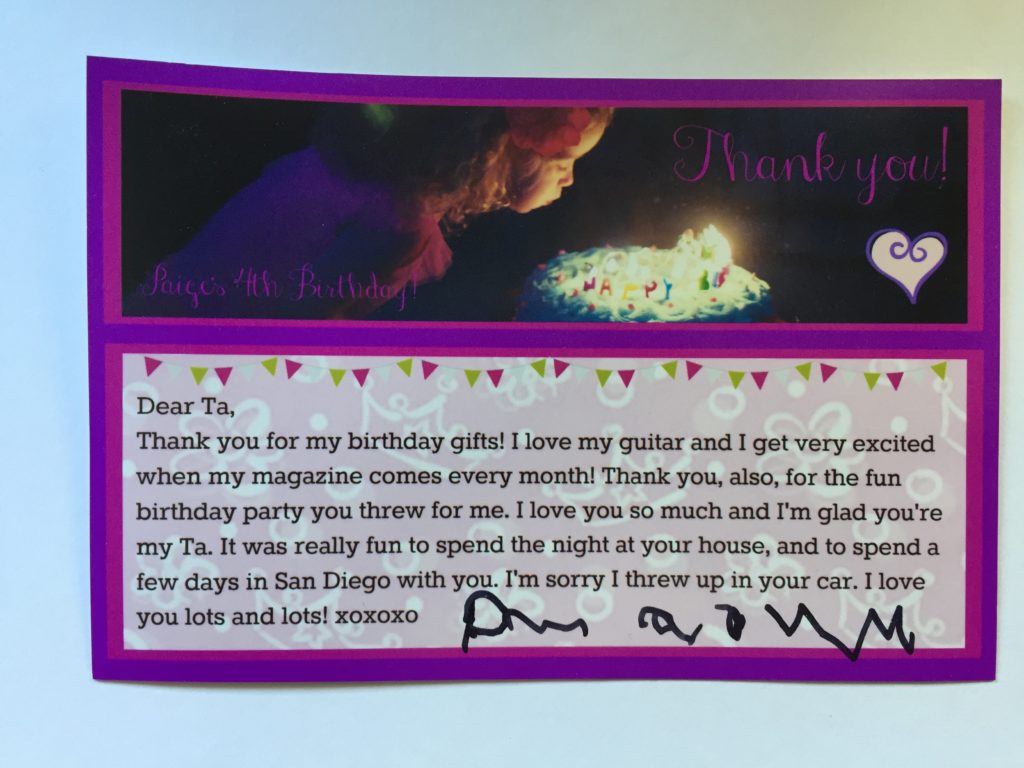
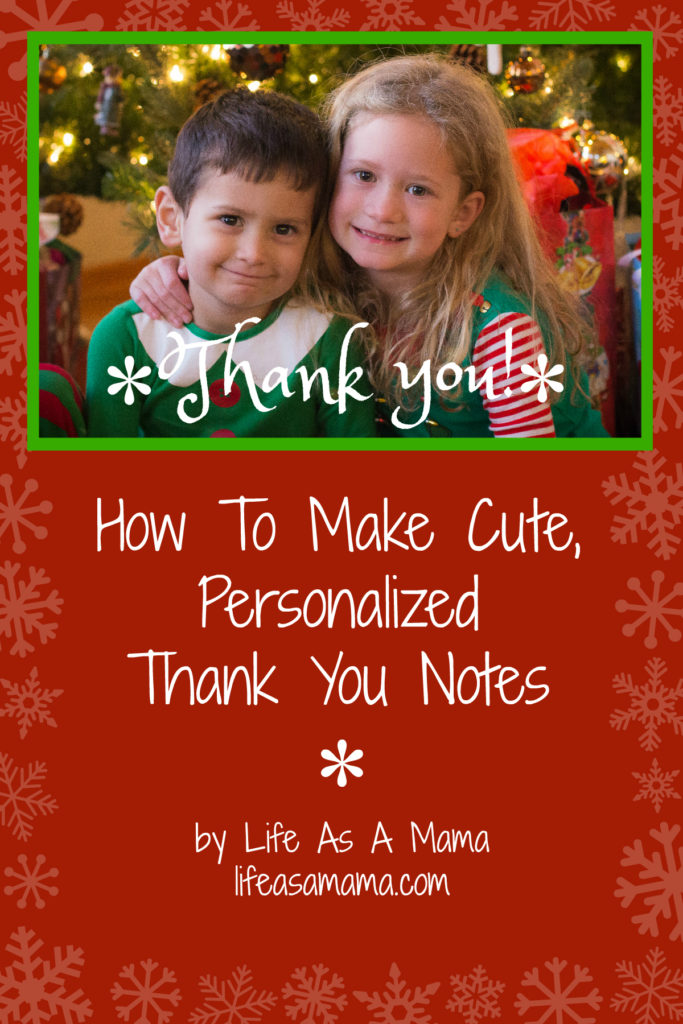
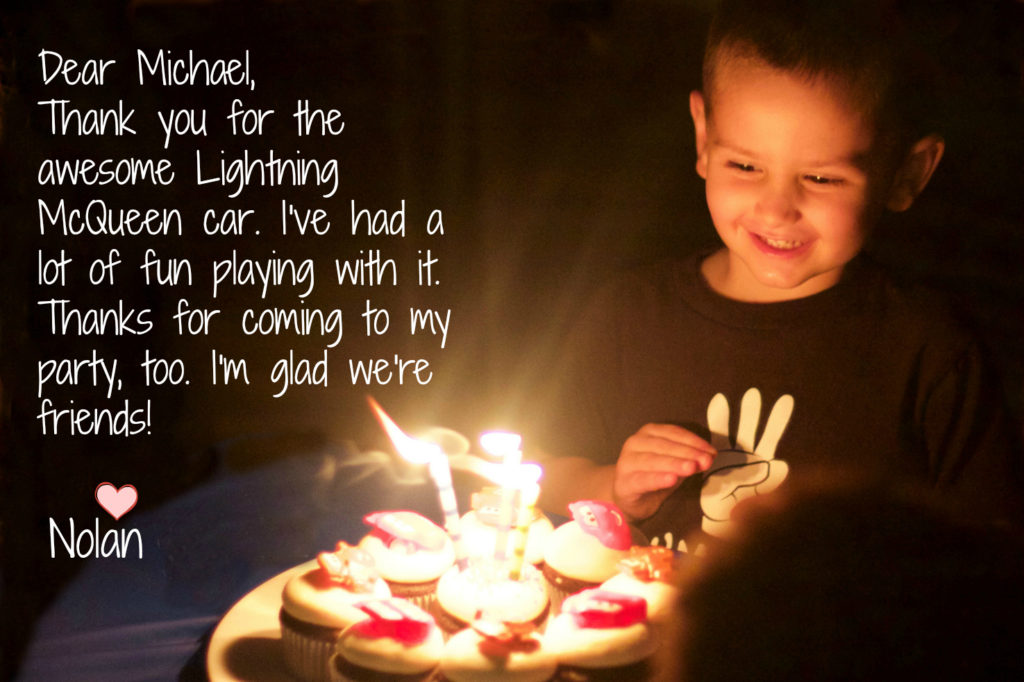
When the kids have had a birthday, or we need to thank friends and family for Christmas gifts (in other words, if I have to write a lot of notes all at once), this is the way I like to do it. Here are some examples of what I’ve done:
How To Make Cute, Personalized Thank You Notes by Life As A Mama

How To Make Cute, Personalized Thank You Notes by Life As A Mama

How To Make Cute, Personalized Thank You Notes by Life As A Mama

I’ve had several friends ask, “How did you do that?” so this is for you, dear friends!

First I make sure I sort through my photos from the birthday party or Christmas that requires thank you notes. I try to find a photo that has negative (empty) space where the message can be written, or, if that’s not available, I look for a cute photo of the birthday kid that I can use on an area of the card. I save the photo in a place where I can easily find it (I usually use my desktop). Then I create my card with PicMonkey, my favorite online editing, free (unless you decide to pay $33 per year for their premium plan, PicMonkey Royale, which I’ve found very useful at times) software. I’m not a graphic designer. PicMonkey is super easy to use and you can create anything you want with it. I’ve made Christmas cards, invitations, edited photos, etc.

This may seem like a lot of work but, once you get familiar with PicMonkey and your card is created, it takes about a minute to type and save each card.

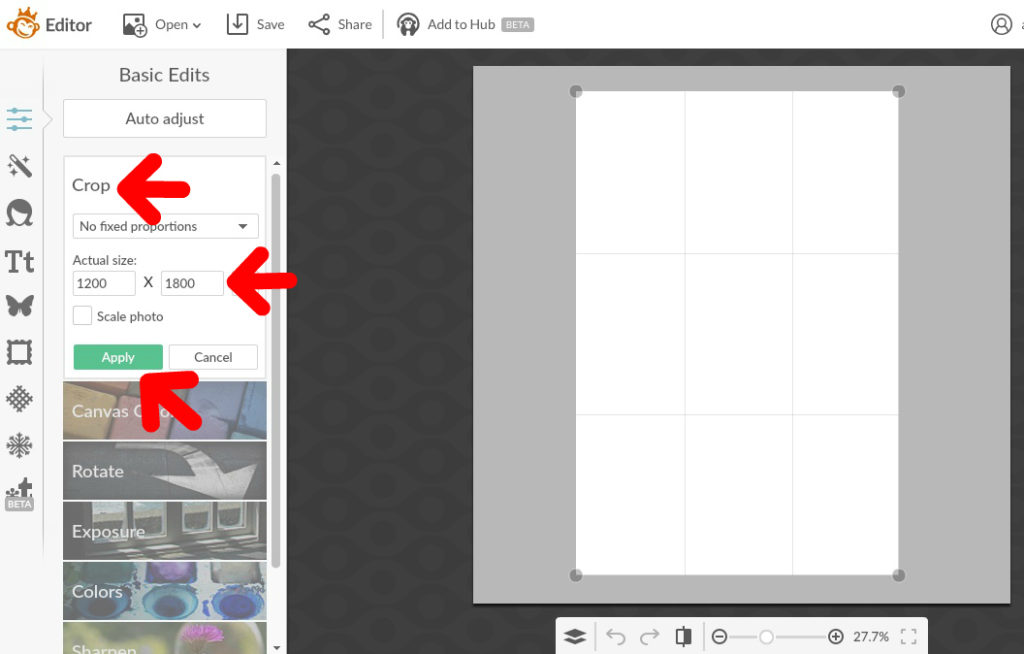
After picking my digital photo, I go to PicMonkey and click on “Design” at the top of the window. I’m then taken to a window with a blank white canvas on it. On the left side, I click on “Crop” then, because I print my thank you notes as 4″x6″, I change the size of the photo to 1200×1800. (This means 1200×1800 pixels per inch. If that doesn’t make sense to you, don’t worry about it. Just know that these dimensions will give you a nice looking 4×6 photo.) If you prefer a horizontal thank you note, make it 1800×1200. Then click the green “Apply” button.

How To Make Cute, Personalized Thank You Notes by Life As A Mama

How To Make Cute, Personalized Thank You Notes by Life As A Mama

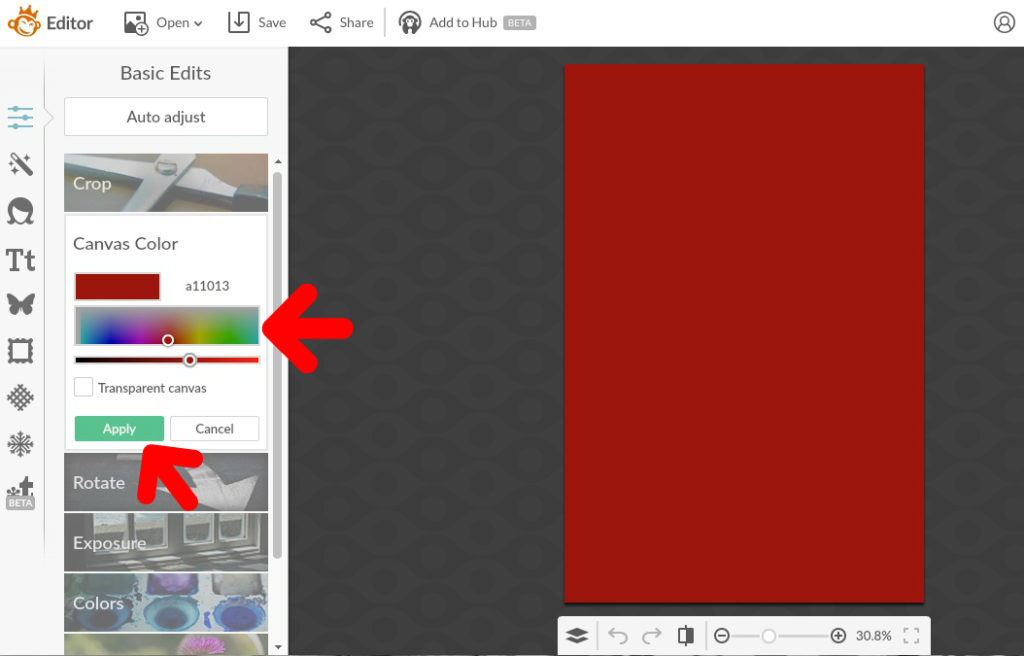
After your thank you note is the size you want it to be, you can change the color of the background if you want to. Click on “Canvas Color” right below crop and pick your color! Since the thank you notes I need to write are for Christmas, I’m making the background red. Don’t forget to click “Apply.” I’ll add embellishments later.
How To Make Cute, Personalized Thank You Notes by Life As A Mama

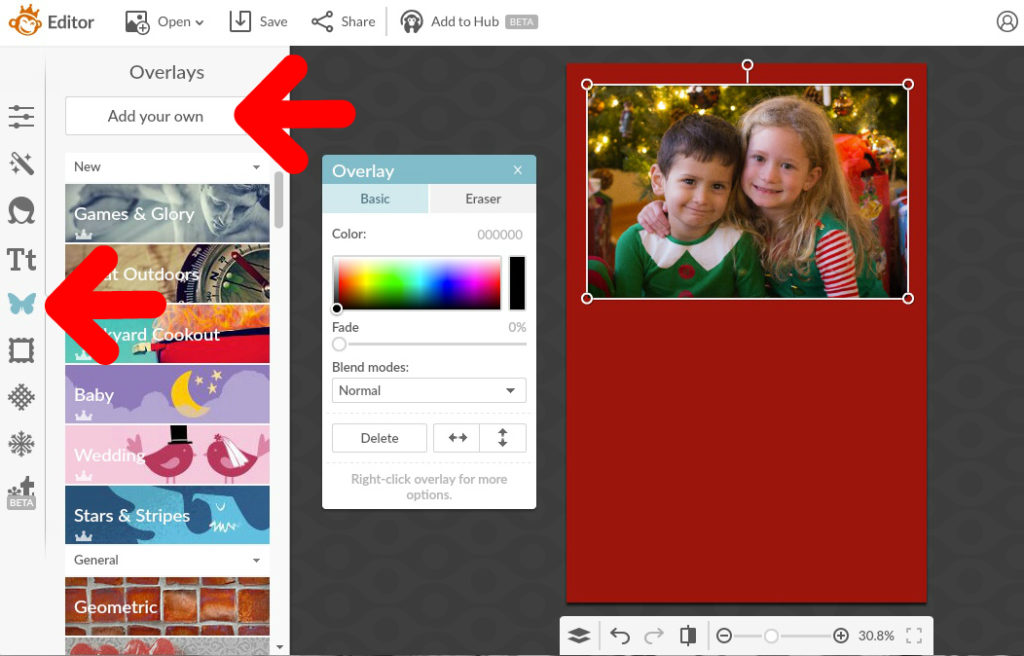
Now it’s time to add the photo! Click on the butterfly on the left side of the screen. This will take you to the overlays. At the top of the bar on the left, click on “Add your own.” A window will open up. Find your photo (mine was on my desktop) and click “Open” and your photo will magically appear on the thank you note you’re creating! Move it to where you want it by clicking and dragging. If it needs to be resized, just grab a corner or edge with your mouse and change the size as needed.
How To Make Cute, Personalized Thank You Notes by Life As A Mama

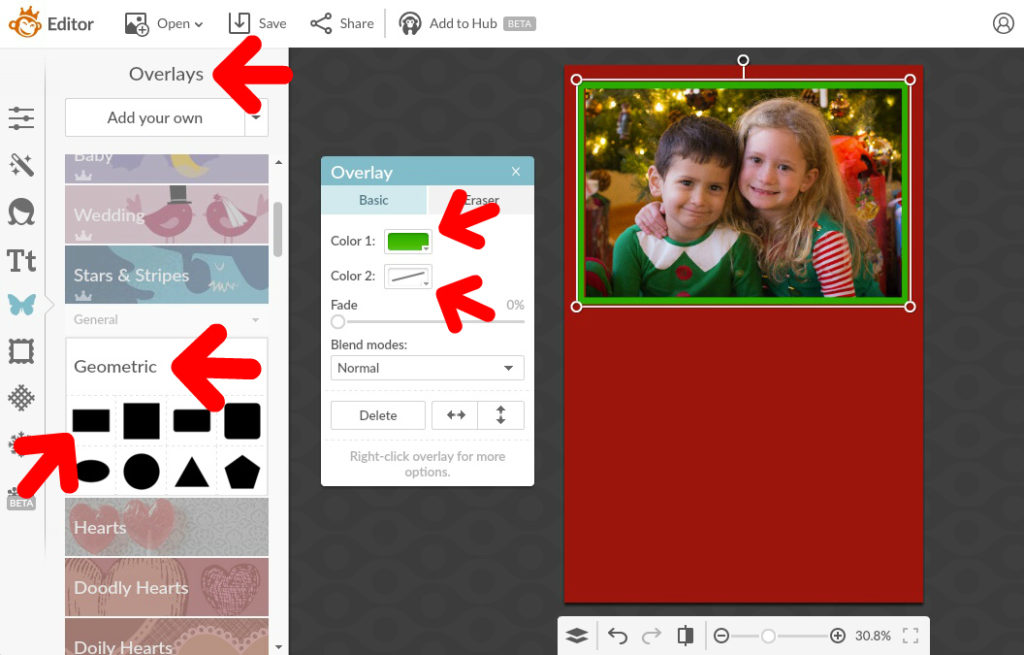
I wanted to give my photo a more finished look, so I decided to add a frame to it. To do this, while in “Overlays,” I scrolled down, on the left side, to “Geometric.” I clicked on the rectangle, changed color 1 to green and color 2 to transparent, and had my frame! Then, using my mouse, I changed the size of the rectangle to match my photo, moved it into place with my mouse, and my photo was framed.
How To Make Cute, Personalized Thank You Notes by Life As A Mama

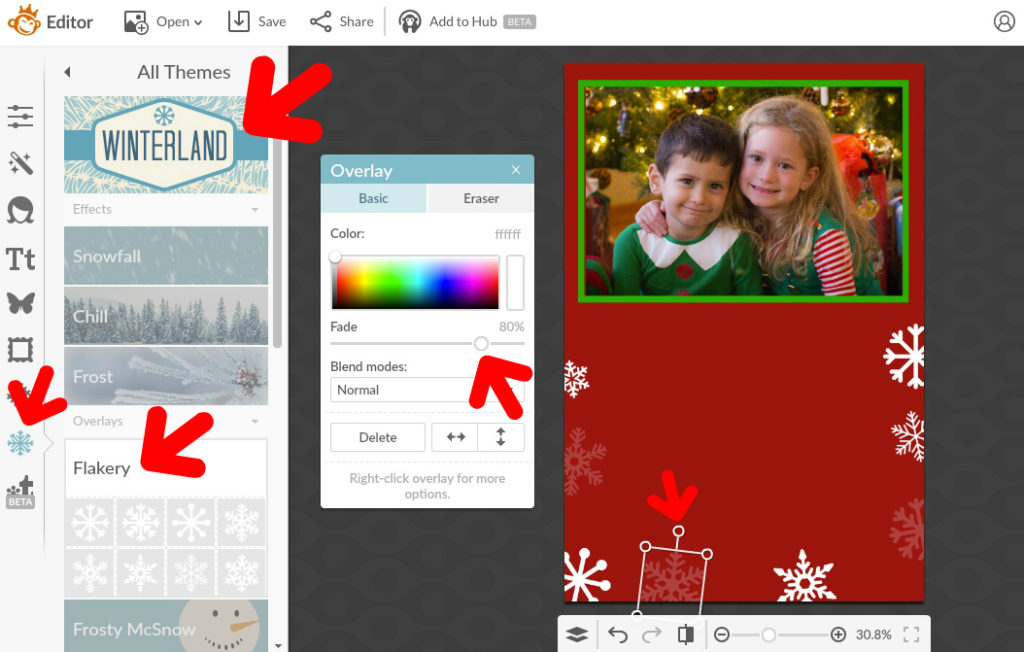
Next I wanted to add some pretty embellishments to my thank you note. I thought some faded snowflakes around the edges would look nice and wouldn’t distract from the text that I would add later. I clicked on the snowflake icon on the far left towards the bottom. *This is where PicMonkey stashed the holiday stuff. These items can also be found in the Overlays (butterfly icon) section.  Sorry…sidetracked. Back to my card design.* Then I clicked on “Winterland” on the top on the left under “Themes.” About half way down on the left, I clicked on “Flakery.” Hello snowflakes! I clicked on them to add a whole bunch to my page, then moved them to the edges of my card. Using my mouse and holding the mouse button on the little circle at the top of each snowflake, I was able to tilt them to different angles and I resized them to make some smaller so they wouldn’t all look the same. To lighten the snowflakes, I slid the “Fade” slider to 80% for each snowflake. I added more snowflakes as needed.
How To Make Cute, Personalized Thank You Notes by Life As A Mama

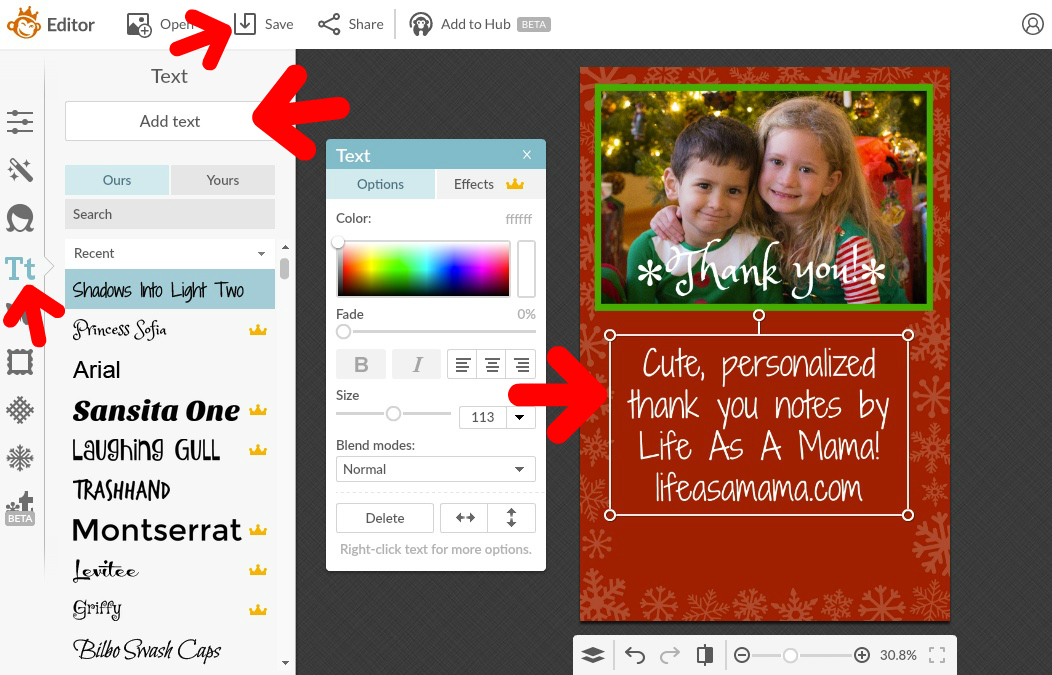
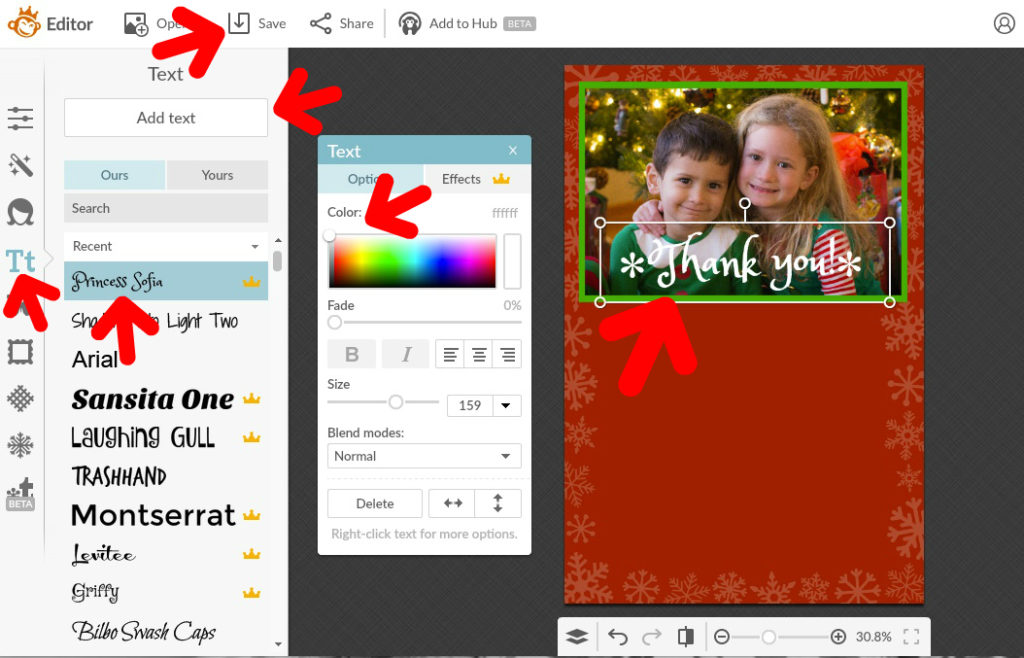
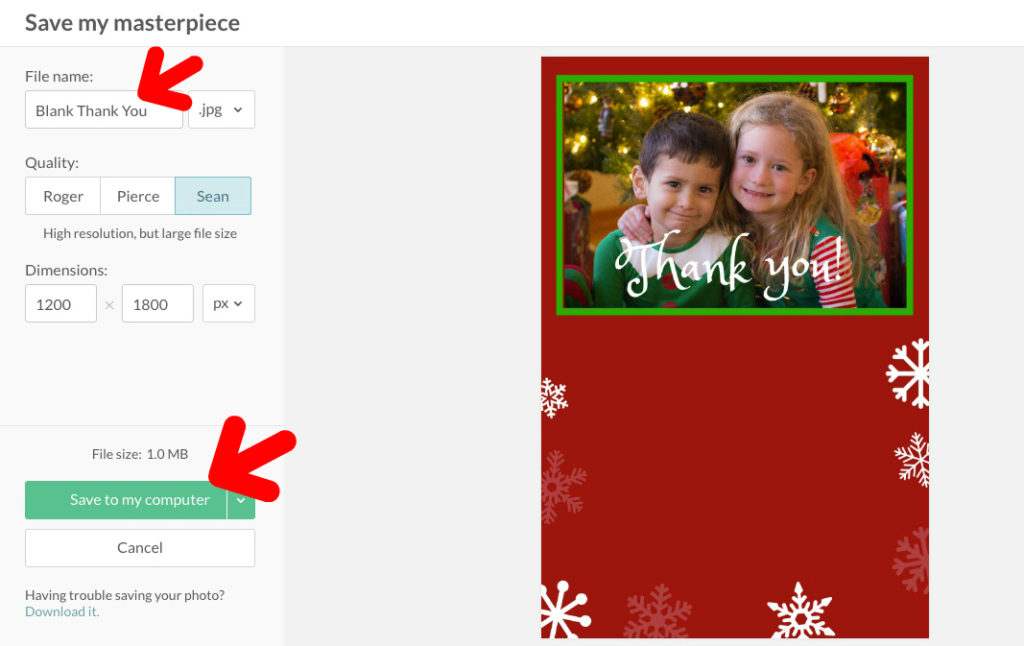
Then it was time to add text. I wanted to write “Thank you!” across the photo. So on the far left side, I clicked on the button that says Tt. I clicked “Add text,” wrote “Thank you!” in the text box that popped on the screen, changed it to white, and moved it into place. Then I changed it to the font I wanted and enlarged it a bit. And my blank card was done! This was the blank canvas upon which all of the thank you notes would be written. I saved this to my computer’s desktop in a folder called “Thank You Notes” and could then close the window (big X in the top right corner) because I was done with the design part of the process!
How To Make Cute, Personalized Thank You Notes by Life As A Mama

How To Make Cute, Personalized Thank You Notes by Life As A Mama

How To Make Cute, Personalized Thank You Notes by Life As A Mama

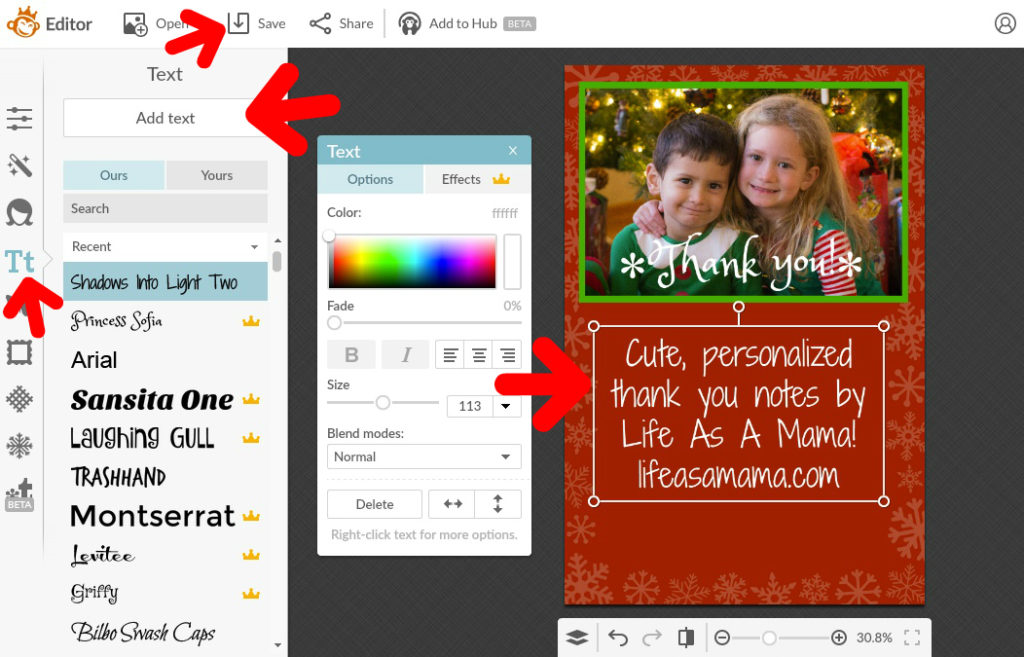
To create individual thank you notes, I went back to PicMonkey and clicked on “Edit” at the top of the window. I found and opened my blank card. I went back to the text (Tt) section, clicked on “Add text” and wrote a thank you note on the red area of my card. Then I saved it and named it according to who it was for. After saving, I didn’t close the card. I changed the text for the next thank you note recipient, and saved it again under their name. I continued this process until all of my thank you notes were written. They were all saved in the “Thank You Notes” folder on the desktop of my computer.

How To Make Cute, Personalized Thank You Notes by Life As A Mama

How To Make Cute, Personalized Thank You Notes by Life As A Mama

How To Make Cute, Personalized Thank You Notes by Life As A Mama

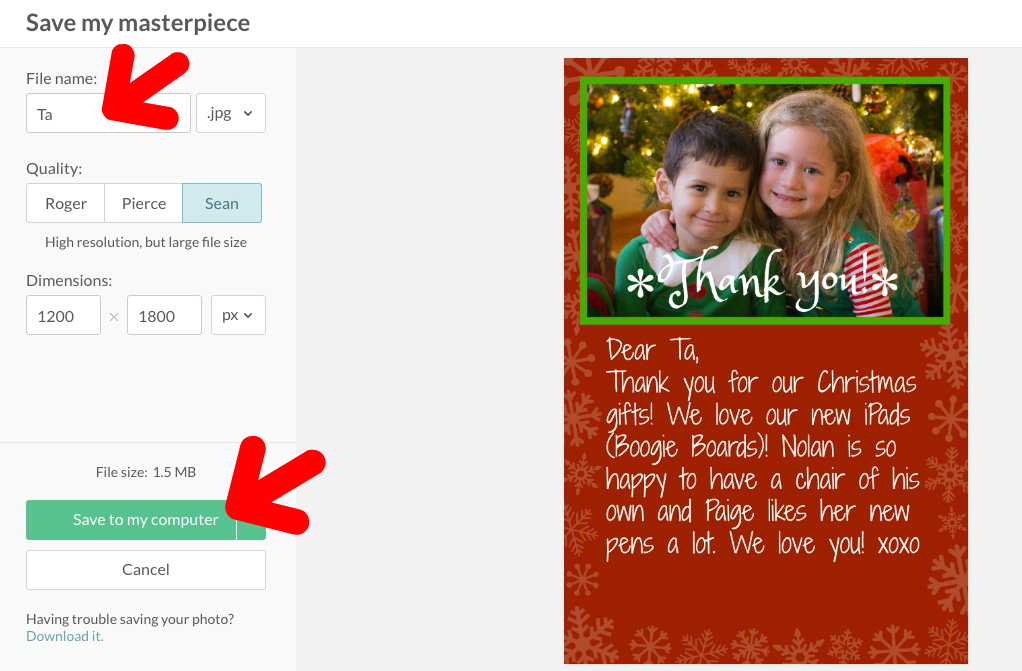
I then uploaded the completed cards to the Costco Photo Center online, ordered them printed as 4×6 with luster finish, and they were ready an hour later! I had the kiddos sign them with a silver sharpie and mailed them off to their intended recipients.
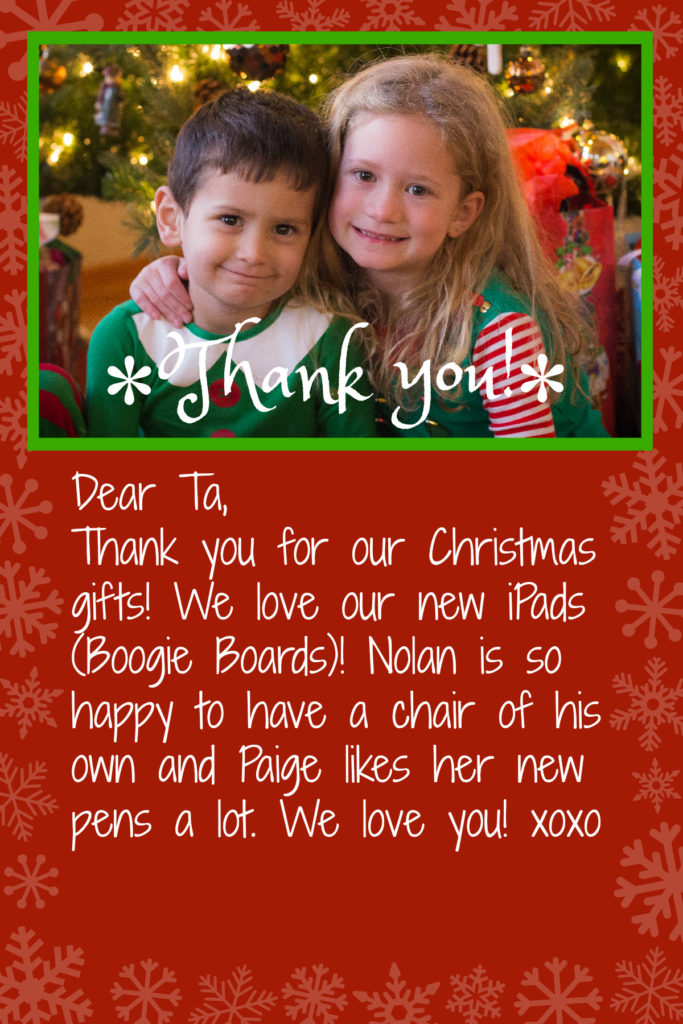
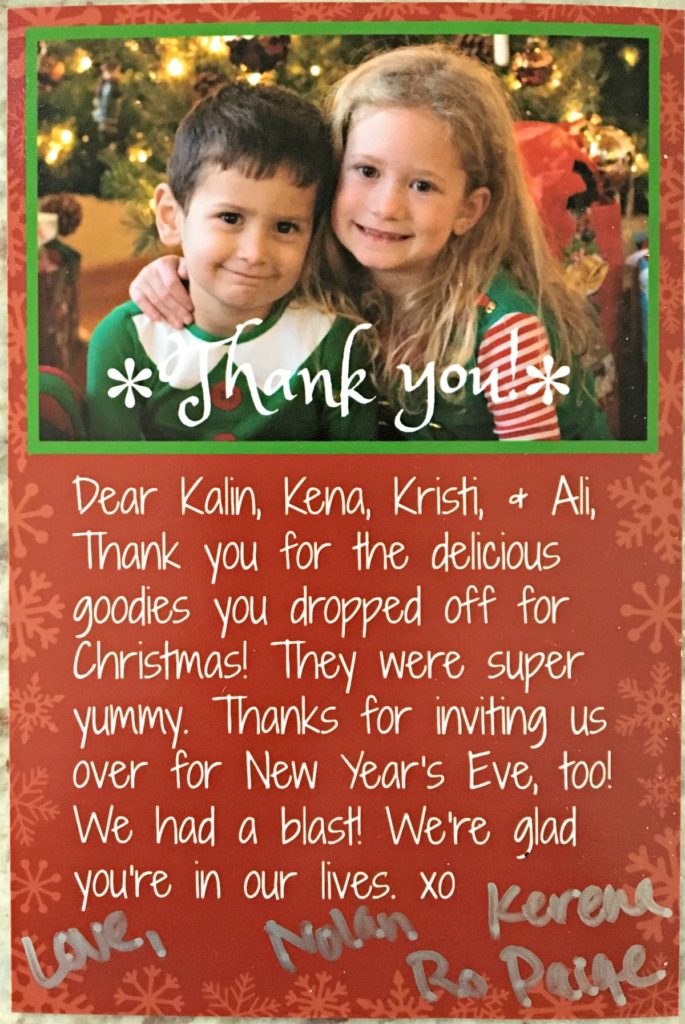
How To Make Cute, Personalized Thank You Notes by Life As A Mama

How To Make Cute, Personalized Thank You Notes by Life As A Mama

I ordered these envelopes for mailing the cards.

I get a lot of compliments on the thank you notes the kiddos send out. I hope you like them too!

~ This post may contain affiliate links. ~

No Comments
DIY

Homemade Laundry Soap, Take 2

  • By
  • September 20, 2012

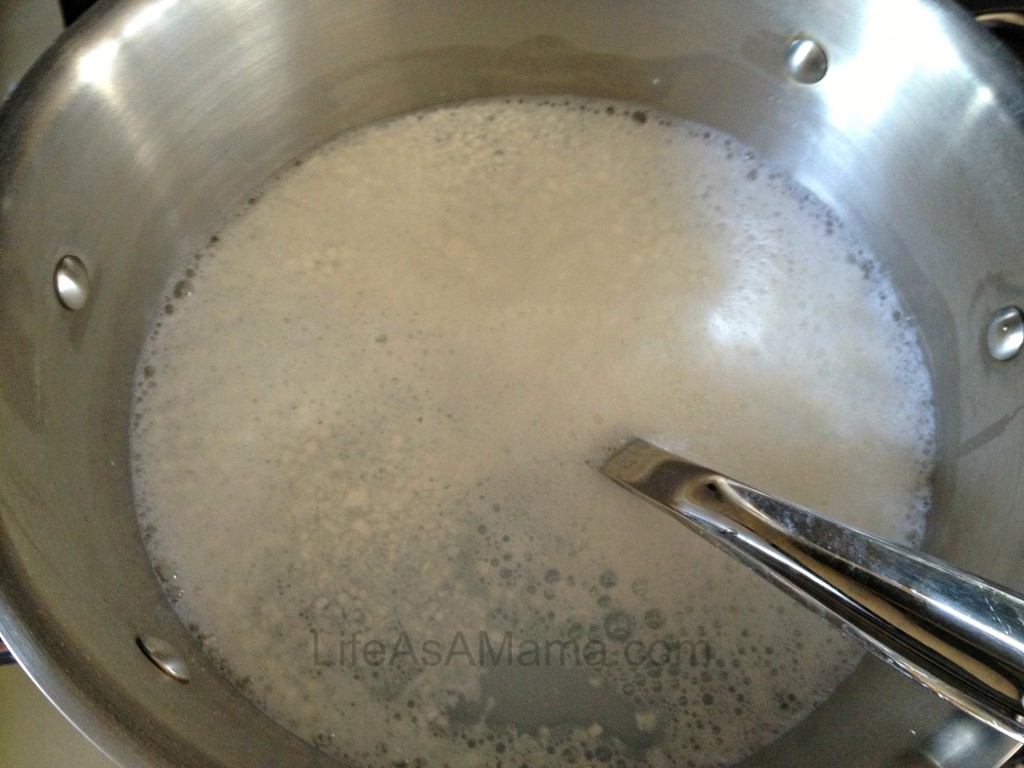
Last year I made my own laundry soap. It was the powdered kind. It worked well, but sometimes I had powder chunks left on my clothes after washing them. White chunks of powdery stuff on my black clothes wasn’t working for me. I tried dissolving it before using it, but that didn’t work so well either.

Today I made my own laundry soap again, but this time I made the liquid kind! Using my favorite resource for everything lately, Pinterest, I found a recipe that sounded good and easy.

The recipe I used is here and the original blog post I found is here.

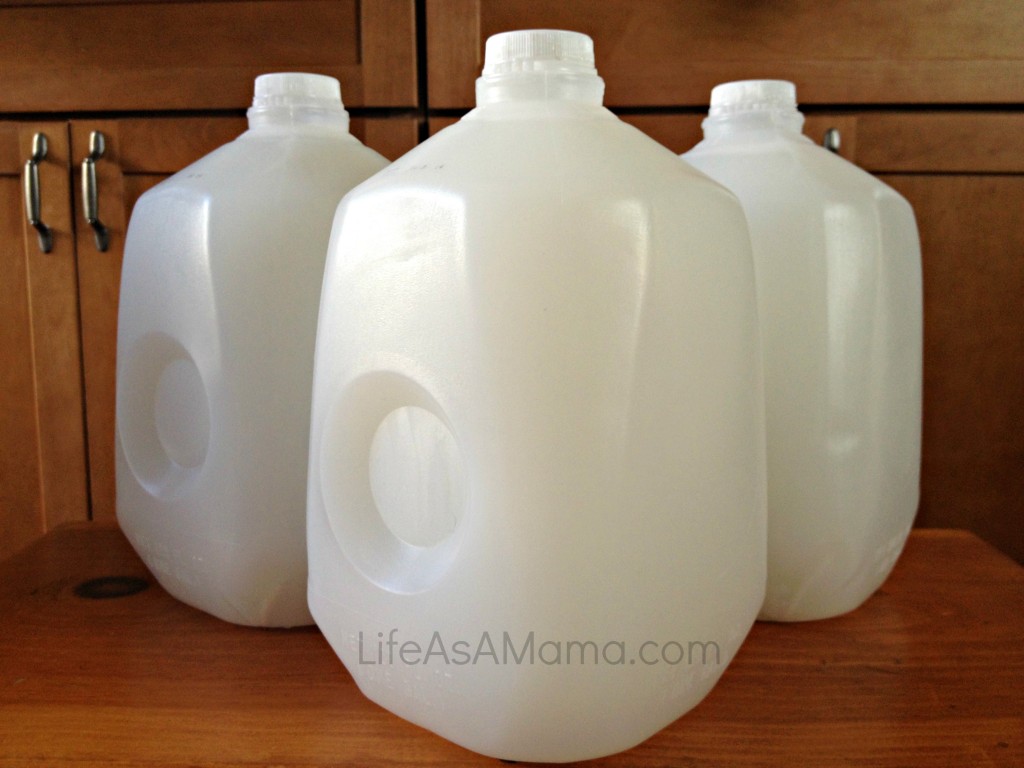
In the recipe, she says to use any kind of bar soap you want. I used Ivory. She also separated it into 2 1-gallon bottles. I learned that it gets quite thick when cooled, so I divided it into 3 1-gallon bottles and added water to each until they were filled up. Then I shook them really well.

Here’s my finished product!

It was so easy to make! It took about a half hour, maybe a little less. And it was dirt cheap! I recommend letting it cool a bit before filling your bottles. The first load is in the laundry now. I love saving money!

No Comments
DIY

Happy Father’s Day

Oh my! Its been so long since I’ve blogged! I have lots of stuff to post and it’ll all be up soon. I promise. Well, maybe promise is too strong of a word to use. Anyway, I’ll work on it.

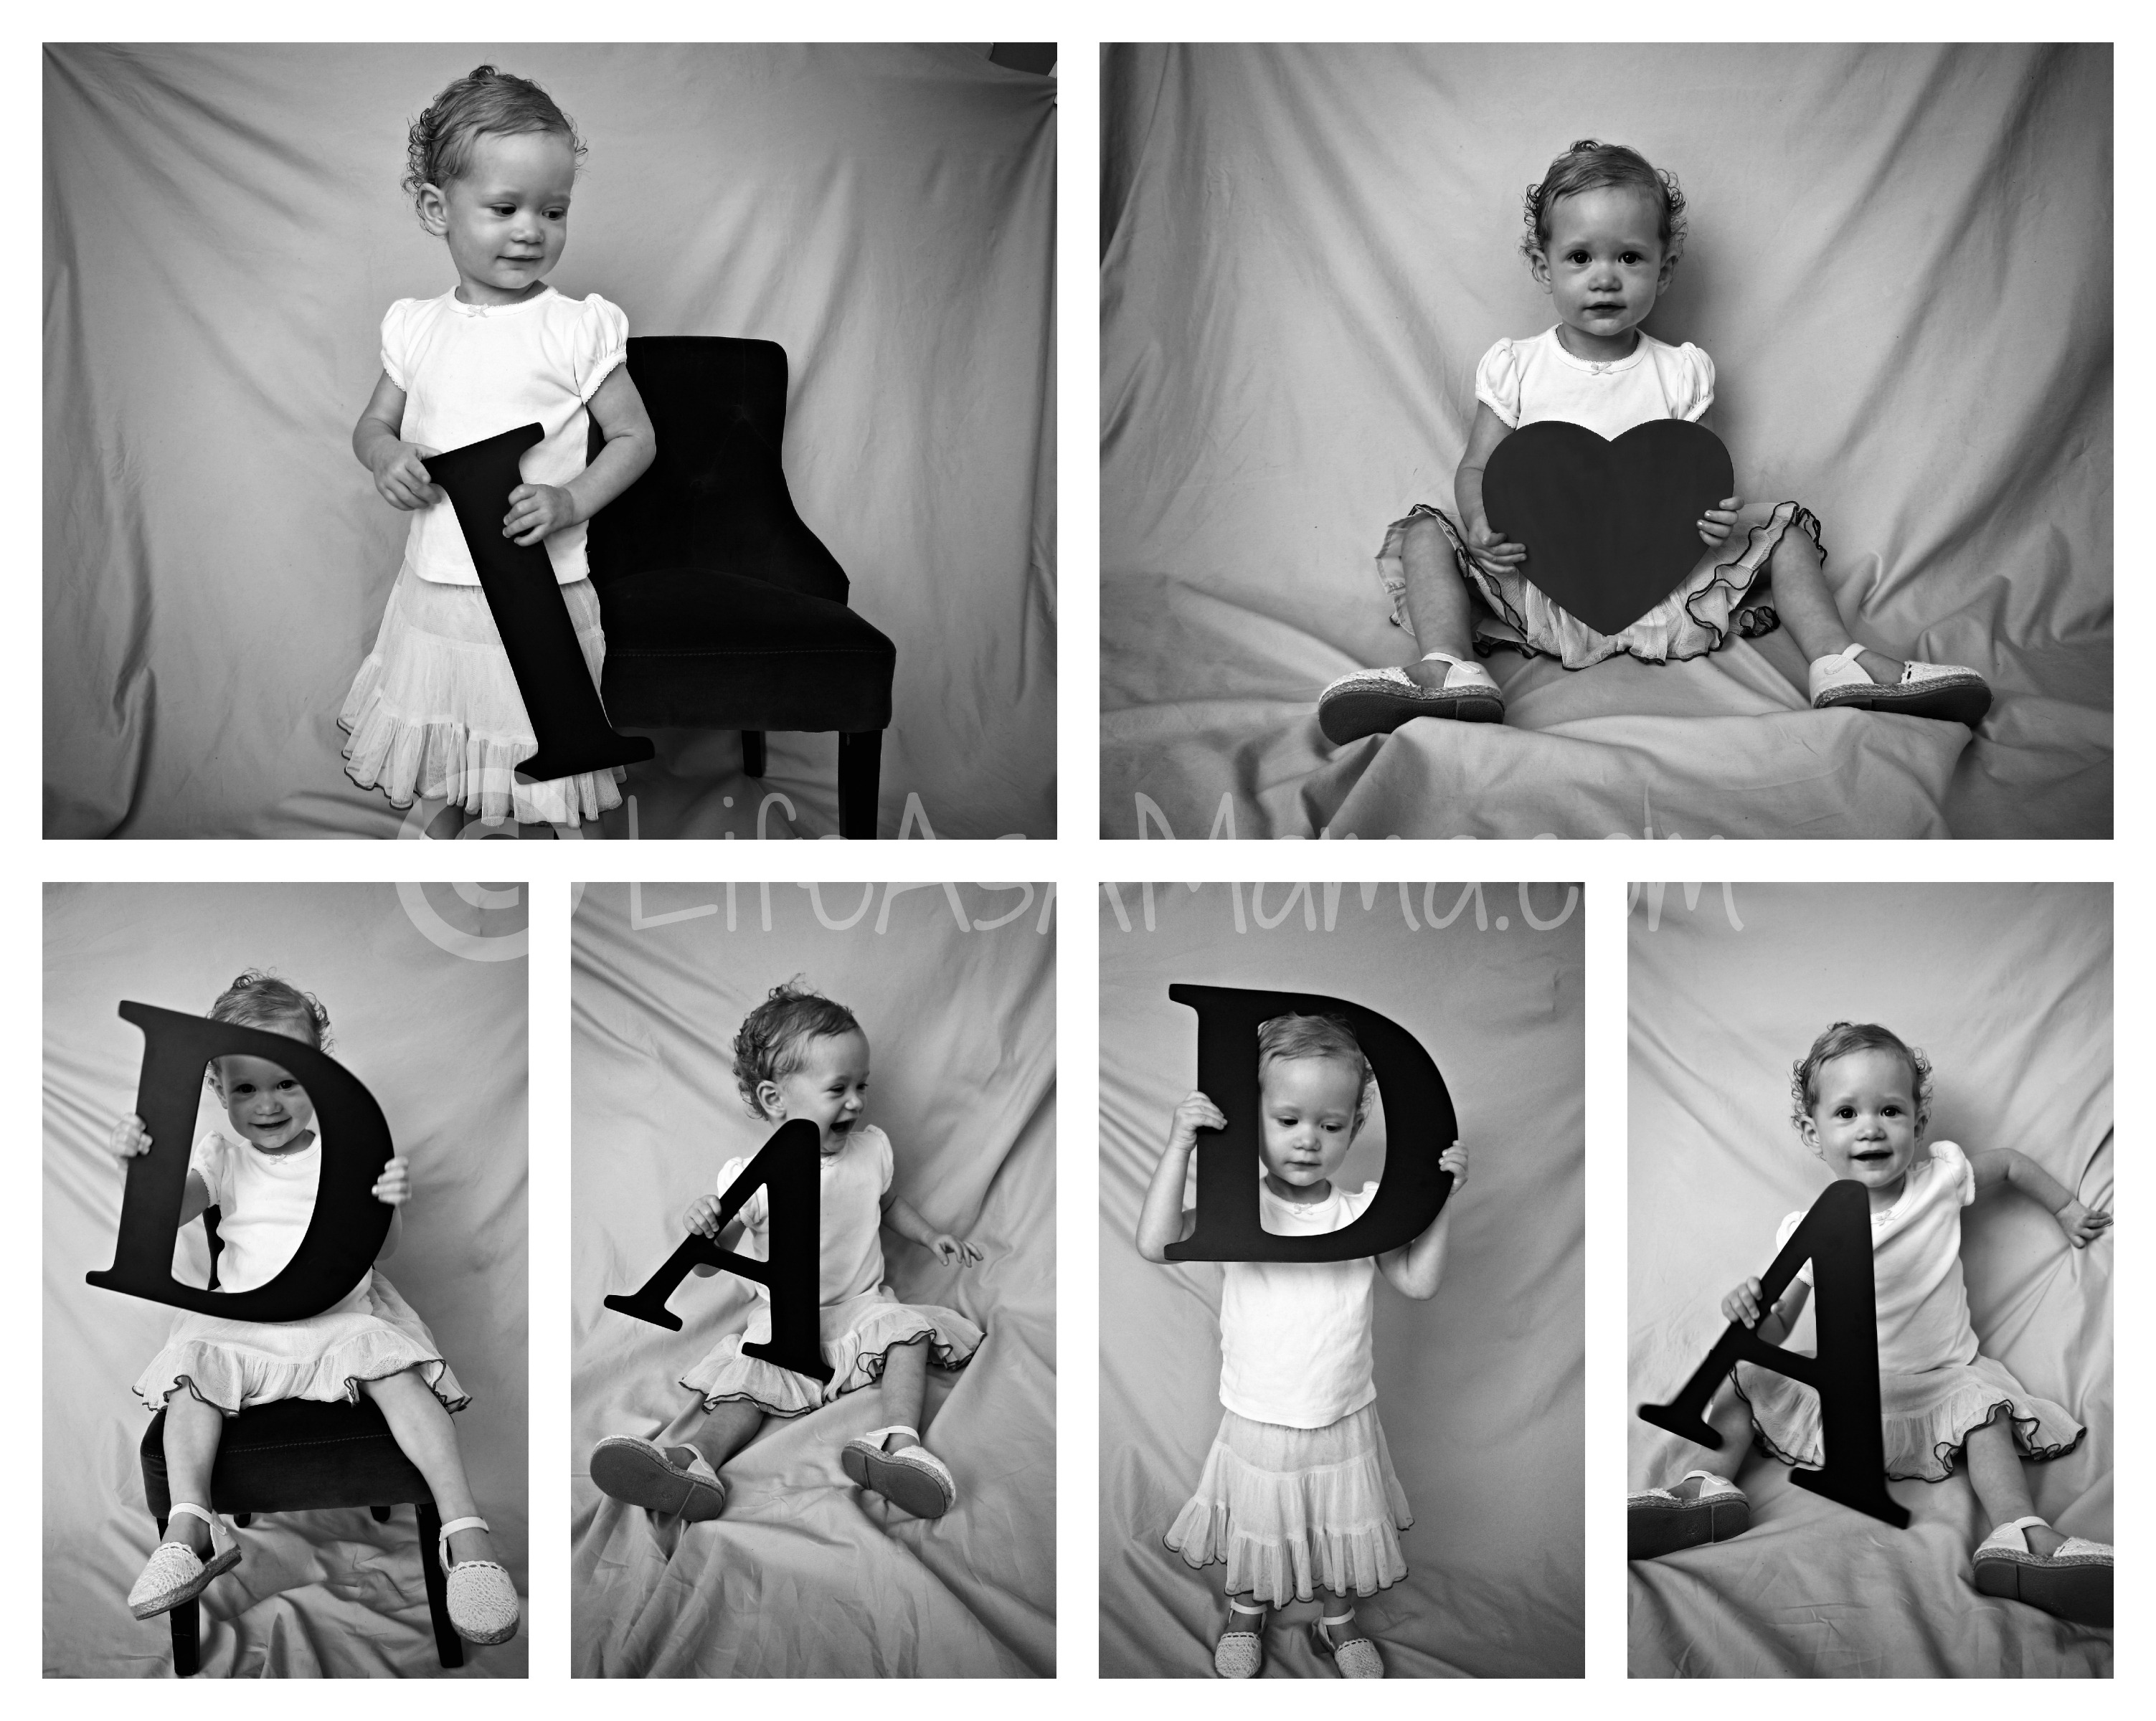
Tomorrow is Father’s Day and The Girl and I wanted to make something special for her dad. Normally she paints or colors something, but I felt like we needed to do something different. So after browsing online (mostly on my current obsession, Pinterest), I got inspired to make this:

I found the super cool big black letters and the heart at Michaels. They were already black, so there was no need to paint them, which made me VERY happy. While Baby Girl was napping I turned my living room into a photo studio in front of our big glass sliding door. The back drop is a light tan colored sheet, and the chair was a gift my aunt gave to Baby Girl before she was born. The outfit consists of hand-me-downs she had in her closet.

It was a bit of a fight to get photos of her not holding the letters the wrong way, running away, and pulling the back drop down, but after lots of bribery and begging, I was successful! I did some photo editing with my new favorite photo editing website, PicMonkey, and submitted it to Costco online to be printed. I picked it up, framed it, and it was ready for Baby Girl to give to her dada.

We got another gift for The Husband that he’ll get on Fathers Day, so we ended up giving the picture to him last night. We were soooooo excited about it, we just couldn’t wait! He loved it!

1 Comment
DIY

Homemade Laundry Soap

I’m almost out of laundry soap. I’ve heard a lot recently about people making their own and I’ve found several recipes on Pinterest, my latest addiction. I never thought I’d be granola enough to actually make my own laundry soap, but a few days ago I found a recipe that sounded easy so I figured, what the heck, I’ll give it a try. I used a recipe I found here.

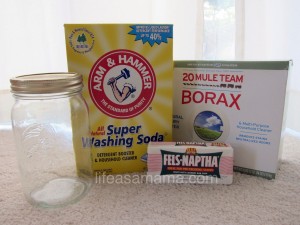
I found all of my ingredients at Walmart. I looked at Target and Ralphs, but Target only had the Borax and Ralphs didn’t have anything I needed. Here’s what I got:

Borax – $2.98

Washing Soda – $3.24

Fels Napthia – $.97

Jar to store my laundry soap in – $0.00 because I already had it at home.

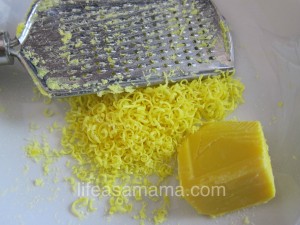
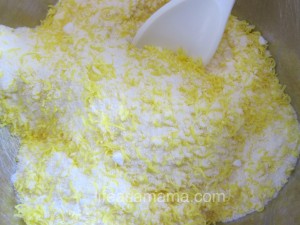
I reduced the size of the recipe I found by 1/3. I mixed together 1 cup of Borax, 1 cup of washing soda, and 1 finely grated bar of Fels Napthia. I used a fine grater that would normally be used to grate Parmesan cheese. Grating the Fels Napthia required a little elbow grease, so I got a workout while making my new concoction!

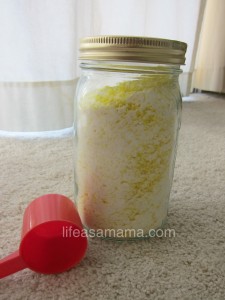
I mixed it all together, dumped it in a jar, and found an old 2 oz coffee scoop to measure it when I wash my laundry. Since the Fels Napthia smells like lemon, this stuff smells awesome! I can’t wait to see how my laundry smells after using my new soap. I have tons of washing soda and Borax left for future batches of laundry soap.

Since the mouth of the jar I used is on the small side, I ended up dumping it all into a larger jar I got at Ikea a long time ago. Scooping it out of a large jar is more convenient.

The first wash with the new soap is in the washing machine as I write this. The Husband’s shirts are going to smell lemony fresh!

Update: The load I did came out great! It smells fresh and is super clean. Yay for cheap DIY laundry soap!

Update 2: Don’t use this on your cloth diapers. I did and while they came out really soft and it removed all the stains, they won’t absorb anymore so I have to strip them. Darn. I guess I’ll have to keep purchasing detergent for my cloth diaper washing.

4 Comments
DIY

Shower Toys Solution

Soooo, yeah. I haven’t blogged in a long time. No excuses. I think the main reason is that I think of what I want to write about at inconvenient times…driving, in the shower, pretty much whenever I can’t be in front of my computer.

The Girl has hit quite a few milestones in the last few months. She learned to scoot, then she learned to crawl but preferred to scoot because it’s faster to scoot than to crawl, she pulls herself up now on everything she encounters, and I think she’ll be standing alone and walking very soon. She tries to repeat words I say to her. She’s such a smartie! She can wave bye-bye, and a few days ago she started clapping and can clap on demand if she’s not having a shy moment. She turned 9 months last week and today weighed in at 16 lbs 1 oz, and she’s 28 inches tall. Getting her to eat food has been a slow process, but we’re on the right track. Cheerios are her favorite thing, but she’s learning that summer fruits like peaches, mangoes, and cherries are also pretty awesome.

Okay, so let’s get to the reason I decided to blog this evening. I made something and I wanted to show it off in case you need something similar and want to save a few dollars. We’ve been remodeling our bathroom. I’ll blog about that sometime soon. Wow. That’s a headache. Anyway, The Girl has tons of little bath toys and I’ve been wanting to get something to put them but being the frugal mama I am (let’s just say it like it is – I’m cheap) I didn’t want to spend $10+ on some shower toy bag thingie that I didn’t like very much and wouldn’t be happy with.

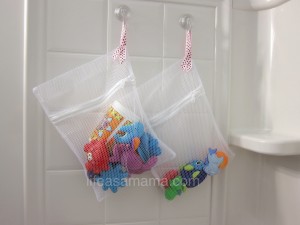
Today I went to Target. I was browsing through the dollar section and came across a 2-pack of mesh bags for washing lingerie for just $1. I tossed them in the cart and headed to the shower section where I picked up a 2-pack of shower suction cup hooks for $2.99. At home I found a piece of ribbon that I cut in half, looped over, and sewed onto a corner of each of the lingerie bags. I put the hooks in the shower, filled the bags with Baby Girl’s shower toys, hung the bags on the hooks, and voila! Two shower toy bags for just $4! Here’s a picture of my genius creation:

They’re functional, nice looking, and won’t be in the way when I need to use the shower. And they’re better than anything I’ve seen that was designed for shower toys. Actually I didn’t look very hard for other options, but that’s okay. They probably would have cost more than $4.

1 Comment
DIY

Baby Gym

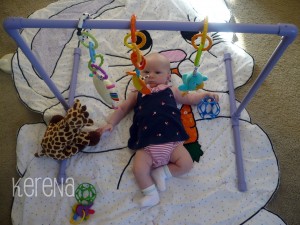
I made a baby gym for my girl!

She needed one (or at least something for her toys to hang from) and I didn’t want to spend lots of money on something she won’t be using for long, so I spent a few dollars at Home Depot and made one myself. My super crafty mama sister designed it and made one for my niece. Instructions to make your own baby gym can be found on her blog. Baby Girl loves it and spent lots of time playing with it this afternoon.

Oh, I almost forgot. The cute bunny blanket she is laying on was made by my grandma.

No Comments